Sunday, July 05, 2015

Learning, Gaps, and Complexity

I was taking a walk along the creek this morning when I noticed something.  White egrets were fishing in a small pool refreshed by lazy flowing water.


Dry stream bed  upstream
 But when I realized that I was downstream from the spot where the road crosses over the dry creek bed, my neurons woke up and started asking questions.  If there is no water upstream, how did the water get here?

I also happen to know, from a previous walk, that even further upstream there are more bird frequented pools of water, so obviously that is where the water comes from, but what happens in the dry bed gap?

Frequently when we are learning about something we are given simple models to help us understand.  Water flows downhill.  It will follow the creek bed from the upper pools to the lower pools.  We are taught how to think about systems like this using a simple logic.  If  A) there is water in a pool upstream then B) there will be water in a pool downstream and at all points between.  These simple models are easy to understand, and they give us a false sense of true understanding of a system.  When we think we have understanding, we stop questioning.  It isn't until there is a gap in our understanding, a dry spot in the creek bed, that we start to seek the deeper understanding of what is happening.
further upstream where bed turns from wet to dry

The most likely answer is that the limestone bed of the creek, is riddled with holes and the water seeps down in to them and comes out elsewhere,  still following the creek bed underground.  But what is happening there is invisible to my available senses.  I also know that there is an alternate source of water in the form of a neighborhood drainage ditch that empties into the creek further down stream.  So this other factor also lets there be water down steam when there is none upstream.
stream bed goes from dry to wet
Water percolates out of the rocks


But lately I've been seeing a lot of this simple logic being applied to more complex social systems, fueling confusion and debate.  Confederate battle flag = Racism AND Confederate battle flag = Heritage.  With our A then B logic model firmly in place we don't see how both can be true (as well as any number of other associations)  Mental Illness + Guns = Mass murder.  Without seeing where mass murder takes place without mental illness cues, and where mental illness + guns = healing.  For example someone with depression takes up marksmanship and has rise in self esteem and feelings of competence.

Everyone keeps calling for various solutions to happen upstream, legislation about what flags can fly where, or who can have a gun when and where, and think it will automatically flow downstream and positively impact what is happening downstream.  But it is a lot more complicated than that.  We need to be looking for the gaps and trying to figure out what is happening underneath the rocks between the upstream view of the society we say we want and the down stream view of the society we actually have.
Monday, April 28, 2014

Artist Trading Cards

I participated in the Women and Creativity Tete-a-Tete Artist Trading Cards event this spring.  What fun it was.  I experimented with a variety of techniques, most of which involved some sort of glass paint.  Some of them have clear overlays like the turtle, butterfly, and poppy.  Some were more of resist type thing painting with glass paint right on the paper.  
 And then for some I used the glass paint on clear (ink jet transparency paper cut down to size) and used the card part as a frame.  Here they are up in the window.
 And here they are on white paper.
 Today I got the traded cards back.  The lovely people at the National Hispanic Cultural Center collected all the cards and redistributed them.  They sent them to me in this lovely, very creative, recycled brown paper holder.
 These are the cards I received.  I was so thrilled to get them.  And so excited to see what other artists came up with.

Tuesday, March 11, 2014

Cat "mascot" head

Every once in a while I get one of those "I wonder if I could...?"  ideas.  This one was a "I wonder if I could make a mascot head?  That might be a good Winter Break project to do with my daughter."  Of course it took until Spring Break for us to actually finish it.  
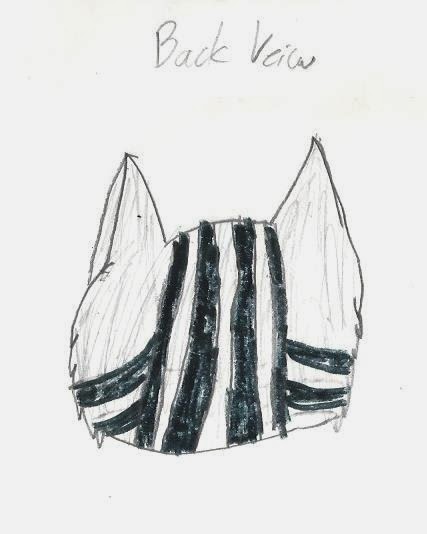
 My daughter loves the Warrior Cats book series, and so she wanted to make a Warrior Cat avatar she had made up for herself.  I told her to draw it from all angles so we would know what the head should look like.  So these are the concept sketches she made.

 We watched a bunch of YouTube tutorials.  And then we went shopping for materials.

 Eyes are made from a stiff fabric needlepoint mesh with fabric marker for the pupils and irises.  Next we put a band of craft foam around them to give them dimension.
 She was very excited that the foam head we found at the craft store was the same size as her head.  The base for the costume head is strips of plastic needlepoint mesh.
 The eyes have been installed and the muzzle is starting to take shape.

 The next step was to hot glue upholstery foam onto the mesh to create a face shape.  My daughter also created a nose from Sculpey clay.
 The ears were created separately and glued on close to the end. This photo is just to show how they look with the head and the addition of foam cheeks and eyebrows.
We wrapped the head in plastic wrap (to keep the tape from sticking) and then duct tape.  My daughter is drawing where the stripes will go.  When she finished I cut the duct tape apart which gave me a pattern for the fake fur.
Here some of the fur is on the face and the rest of the pieces are laid out around the form.  The pile of gray in the background is the duct tape pattern pieces.
 The head is almost done, except for a few details and my daughter poses with her model.
 Here is the finished head with whiskers (wire) and neck.  The jaw is supposed to open, but it doesn't work all that well as she can't open her mouth wide enough to get the jaw open.

Friday, September 20, 2013

Designer Cat Cone


My cat gets itchy and then scratches her neck so much she bleeds.  So I made an outfit for her to wear that protects the back of her neck from her scratching.  
 I started with a structure cut from a milk jug, and then sewed it to a piece of stretchy fabric.  I stitched two pieces of fabric together, trimmed them and then turned it right side out.
 I attached it to a triangular shaped body piece.
 Here is the cat sporting her new designer cone.

Wednesday, August 14, 2013

Display torso


I wanted to create a torso for displaying garment pieces using paper maché.  
 I used pvc pipe to form a "skeleton" for my torso.  I drilled holes in the pvc and threaded hanging wire through it, so that the wire will hold up the torso by the pipe when it is hung.
 I put wire hardware "cloth" around the pvc to give the torso it's basic shape.  I crafted a basic pattern (like for a shirt) and cut that from the wire mesh, and then sewed the mesh together with wire.
 You can see the hanging wire here.
 I layered several layers of newsprint paper maché in strips (alternating direction) over the wire frame, and then did a final layer in brown paper that had been torn into squares.
 I put the squares on diagonally for added interest.
Once the brown paper squares had dried I coated it with a layer of two part epoxy resin to protect it and give it some shine.  


Wednesday, May 29, 2013

Octopus cat toy and failure


Okay, you are now wondering how this cute little thing has the word "failure" in the title.  Well, as a sewing project, this little guy is quite cute.  But this post is more about the creative process, and working with electronics, and learning from failure.   The original plan for this little guy was it would be a cat toy that would jiggle and wiggling ribbons would attract the cat.  So I bought a small vibrating motor and a battery pack and set to work.
The snaps are the switch, attached to conductive thread that goes up through the tentacles.
This is the first configuration, with the vibrating motor and the battery pack in place.  But two things happened here.  One, I learned that when the motor spins inside a stuffed creation--poly fibers wind up on the motor.  The other thing was it is easy to break something this small. 
This is how the motor compares to an eXacto knife blade.  The wires are very short.  I think when I was working with this and trying to strip an end of the wire to have enough exposed wire to work with, I pulled too hard and broke the wire inside the motor.  Once I got it installed in the toy--it would only work if I held the motor at a certain angle.  That was frustrating and I put the project away for a while. 
So I bought a "bigger" motor with longer leads.  This one needed 3-volts to operate, so I had to get a different battery pack as well.  
I used the straw to create a casing to protect the motor from the polyfil stuffing.
So here is the new set up wired into the octopus.  

But, when I put it all together and snapped the tentacles together, it didn't do anything except buzz.  
It did however briefly attract the intended audience... 


Saturday, May 11, 2013

Upcycled Bias Pants

I had acquired some fabric from Fabmo, (a wonderful resource for creative people in the San Francisco Bay area) But I wasn't quite sure what I wanted to do with it with that lovely pattern change (which is on one selvage side going with the grain.)
Sometimes when I'm at the library I leaf through the current edition of Threads magazine, and this time I saw and article for bias pants which was intriguing but looked kind of complicated.  You had to do some math (uh oh math!) to create a rectangle, and then sew it into a canoe shape, and then shift the corners--I stopped reading.
But a few weeks later, I remembered this fabric I had, and thought, oh those bias pants might be very interesting out of this fabric.  So I went back to the library and copied the article.  I made a trial tube from some old fabric, just to try it out, and learned that I needed to adjust some things--but I got the concept.  Basically is creates a spiral from the original rectangle.
Here are the finished pants.

And me wearing them.